The 5 minute social media schedule
/Social Media.
Ohhhh those two words can really pack a punch can't they? So much good and so much frustration can be wrapped up in the world of social media. But as small business owners we can't ignore it. We need to find customers and clients and in order to do that you have to go where the customers and clients ARE.
People are on social media. Like it or not, it's the way of our world at this time. Maybe in another couple of years things will change (actually I'm sure they will because as we all know, things are ALWAYS changing...) but in 2015 and soon to be 2016, social media is HUGE and it can be a powerful way to find clients and talk about your business and what you have to offer.
There are countless articles and blog posts floating around out there about ideal posting times for all of the social media sites. I won't' go into detail with that in this post, but in order to maximize effectiveness it is a smart idea to post to your social media accounts throughout the day at ideal times. This can be a huge headache however since we all obviously have lives to lead and businesses to run so we don't have all day to sit around waiting for the best times of day to post everything.
Enter the beauty of the social media schedule.

I really started thinking about scheduling my social media once I started focusing on growing my blog and blogging more consistently. Now that I had some quality content to share, I needed a better way to get my info out there into the interwebs in a way that wouldn't handcuff me to my desk waiting for ideal times.
Buffer to the rescue.
In summer of this year (2015) I took a few hours and sat and thought about exactly what kind of schedule I wanted to stick to for social media. What accounts I wanted to focus on and how often I wanted to post to them. After some tweaks and experimentation, I have arrived at a strategy that I am happy with for now, with the knowledge that things might change in the future based on trends, developments in my business etc...
As we ALL know facebook is an ever changing beast that is not all that friendly to businesses hoping to get some free marketing from the platform. I don't hate on facebook for making the changes they have, they have a business to run too, but it can be hard for some people to swallow because there was a very small window where marketing on facebook for your business was free and it was glorious!
But things have changed and now facebook greatly reduces what your "fans" will see on your page. Unless people start engaging with the post, the post will die off pretty quickly and not be seen in the news feed at all. The only way it will really get traction is if someone goes directly to your page to find content.
For this reason I don't spend a lot of energy posting content on my facebook page, at least not educational content. I still feel like sharing images from sessions for clients is a great way to potentially reach new clients on facebook but in the past 6 months I haven't had a steady stream of clients since we just relocated. In the future, the number of times I post to facebook during the day may increase when my sessions increase.
For now, I post my blog posts to facebook once a day I like to keep my page updated so if prospective clients visit my page they will see I am active and relevant. Sometimes when I visit a business owner's page and see they haven't posted anything since April of last year it makes me wonder if something is up.
I have a love/hate relationship with twitter, as I think a lot of other people do. I do think there is value in the platform, but it moves so fast and honestly can be just plain difficult to figure out
For this reason I choose to share liberally to twitter, but I don't stress too much about it and I don't actively engage either. I will likely re-evaluate my twitter strategy in the next 6 months or so just to make sure I'm not wasting time or throwing away valuable opportunities!
Google +
Google + is somewhat of an untapped resource. Even though no one is hanging out there, google plus is a great boost for SEO. Now, I don't pretend to be an SEO expert in any way shape or form nor do I know exactly how it works, but I know that sharing content to Google + and hashtagging helps your stuff show up in searches. I've done some very unofficial research and what I found is enough to get me posting to Google + on the regular. I might save some of this juicy info for another blog post so be on the lookout!

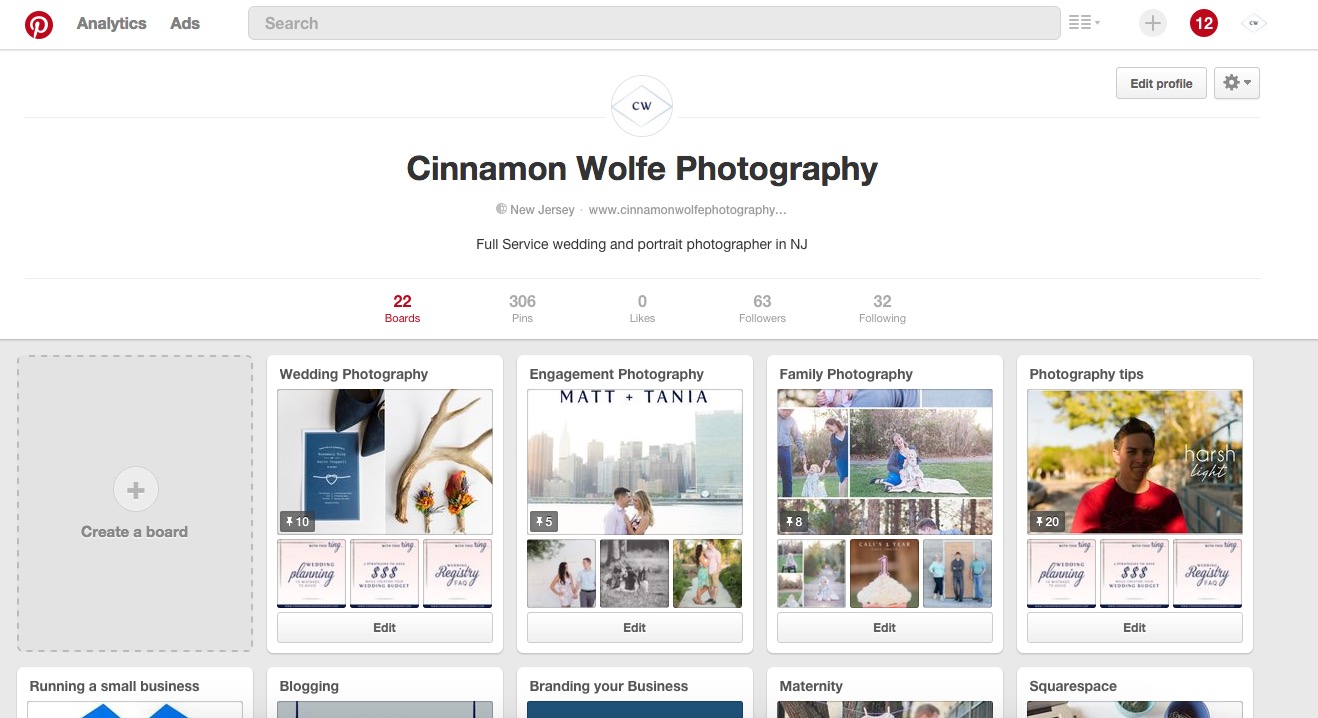
Pinterest is another fantastic source that I think a lot of bloggers and photographers don't use to its full capacity. I share posts to my own boards and on occasion to the Rising Tide Society boards and I get repins all week long. Especially my educational content. People ARE on pinterest. Your content needs to be there as well.
And if all of the above wasn't ENOUGH, there is also Instagram. Instagram is currently in its heyday, especially for small business creatives. It took a while for people to understand how easily they could use instagram to find what they are looking for, but it's catching on and people are figuring out its a great place to find new services, products etc...And for photographers it's a no brainer. It's the perfect way to showcase your work and add hashtags so people can find what you are selling. I try to post to IG at least once a day, I mix personal with business and I try my best to keep a general aesthetic to my feed.
I have had clients and brides find me on Instagram so I think the potential to drum up business from this medium is HUGE. It's just all about knowing how to use the system to your advantage.
Social Media Schedule
You might be saying to yourself right now..."Cinnamon you have listed FIVE different social media platforms! Isn't that too many? Most of the info out there says to stick with one or two, three maximum. Isn't this post about saving time and not adding more time to your day?"
I get it...five social media platforms IS a lot. And they probably aren't all necessary. However, when you create a schedule and a system for posting your content, the time factor kind of flies out the window. I can get my current day blog post out on all of these platforms in under 5 minutes now that I have a good system and schedule in place!
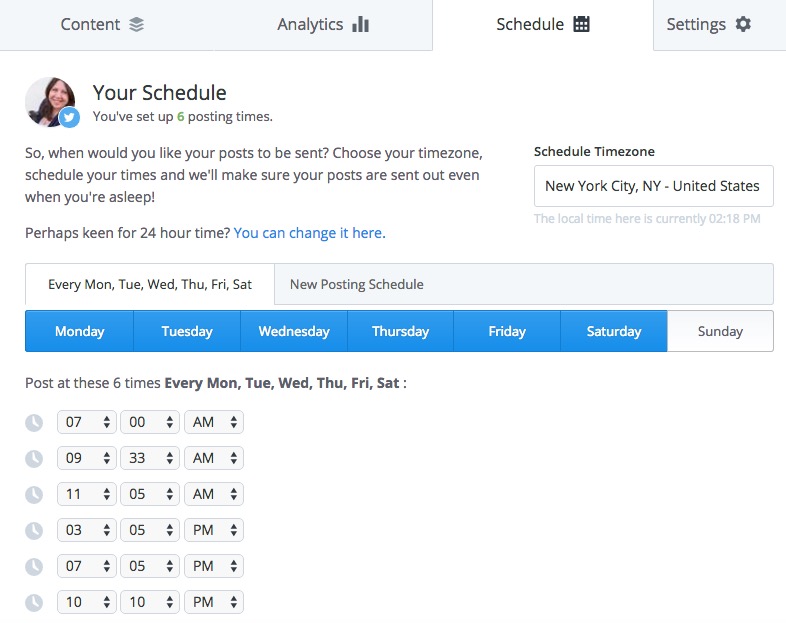
Buffer and the schedule
I use Buffer to schedule out all of my posts on Facebook, Twitter and Google +. The interface makes it so easy to add posts to your queue, caption, hashtag, add images...whatever you want to do. Then you just set your posting times and Buffer does the rest for you. Its super easy peasy.
I pin my images to Pinterest right from the blog post and I use latergram.me to post images to Instagram. I can take care of all five platforms in literally five minutes every morning.

So this is the gist of my schedule:
- Facebook : Once a day
- Twitter: 5 times a day
- Pinterest: Post to relevant boards
- Google + : Once a day
- Instagram: once or twice a day, never back to back (always allow a few hours between posts so you don't clog up people's feeds)
If you would like a more in depth look at how I use Buffer to schedule everything I made a video where I go through my process of posting everything. This is what I would do on any given day that a blog post is going live. I know the video is 20 minutes, but I'm talking and explaining throughout so that accounts for the length. Normally the process takes me about 5 minutes. Enjoy!