Same location, three looks | Wide, Medium and Tight

Last week I shared the one year anniversary photos for Chris and Chelsea. During our session I also took some headshots for Chelsea for her design business

As I went through her photos, I noticed a technique that I have been working on really emerged out of the set of images. I learned this technique mostly from studying other photographers work through their blogs or online galleries and I feel that at this point it is almost becoming second nature. YAY!

How to get multiple looks from one location by shooting wide, medium and tight | Cinnamon Wolfe Photography | NJ Wedding Photographer

Posing subjects is probably one of the most difficult parts of photography (well at least for me anyway!) Knowing what makes the body look good (read Roberto Valenzuela's Picture Perfect posing for that...) and then directing someone into those positions is something that just takes time and practice. 

What I tend to do when I'm at a session and my mind goes completely blank as for what to do next, my instinct is to move locations. However, you are already in a great location, with (hopefully) great light!! Moving to another location (not to sound dramatic) puts that at risk. Varying up what you shoot in the location you are already in is a much easier way to achieve different "looks" for the client without moving much at all from the location they are in. 

Simple changes in pose, plus incorporating different perspectives in your focal length and composition can dramatically change the look of the photos and the client literally doesn't have to move their feet one inch!


In this first set of three images, I used an 85mm 1.8 (my fave for portraits) and scooted way back so I could get a full body shot of Chelsea. I had her stand a bit off of the wall to create some depth and directed her to have some separation in her legs, had her at an angle to the camera and also a bend in the elbow. 

Same location, three looks | Wide, Medium and Tight | Cinnamon Wolfe Photography | NJ Wedding Photographer

Then I got in closer, incorporated her awesomely fun hat and had her simply switch the way her body was positioned and look down to her shoulder. This was my medium shot incorporating almost all of her body, but not a full length like I had just taken.

Same location, three looks | Wide, Medium and Tight | Cinnamon Wolfe Photography | NJ Wedding Photographer

Then I got even closer and directed her again to move slightly and give me that amazingly beautiful smile of hers and got a nice tight shot of just her face with a strong rule of thirds composition. 

Same location, three looks | Wide, Medium and Tight | Cinnamon Wolfe Photography | NJ Wedding Photographer

In this next set of images, we just happened to walk by this gorgeous white door and concrete stairs and I knew we had to stop. The natural reflection of the concrete paired with the simple, elegant background of the white doors plus her delicious oxblood sweater was a match made in photography heaven! 

These were also shot with my 85mm and for the first shot I had her right in the middle of those rails for a nice, wide center composition.

Same location, three looks | Wide, Medium and Tight | Cinnamon Wolfe Photography | NJ Wedding Photographer

I moved closer again and had her pose slightly different and went in for my medium range shots from about the knee up. 

Same location, three looks | Wide, Medium and Tight | Cinnamon Wolfe Photography | NJ Wedding Photographer

And then we got that hat again and got in nice and close for a tighter shot with a lot of expression. 

Same location, three looks | Wide, Medium and Tight | Cinnamon Wolfe Photography | NJ Wedding Photographer

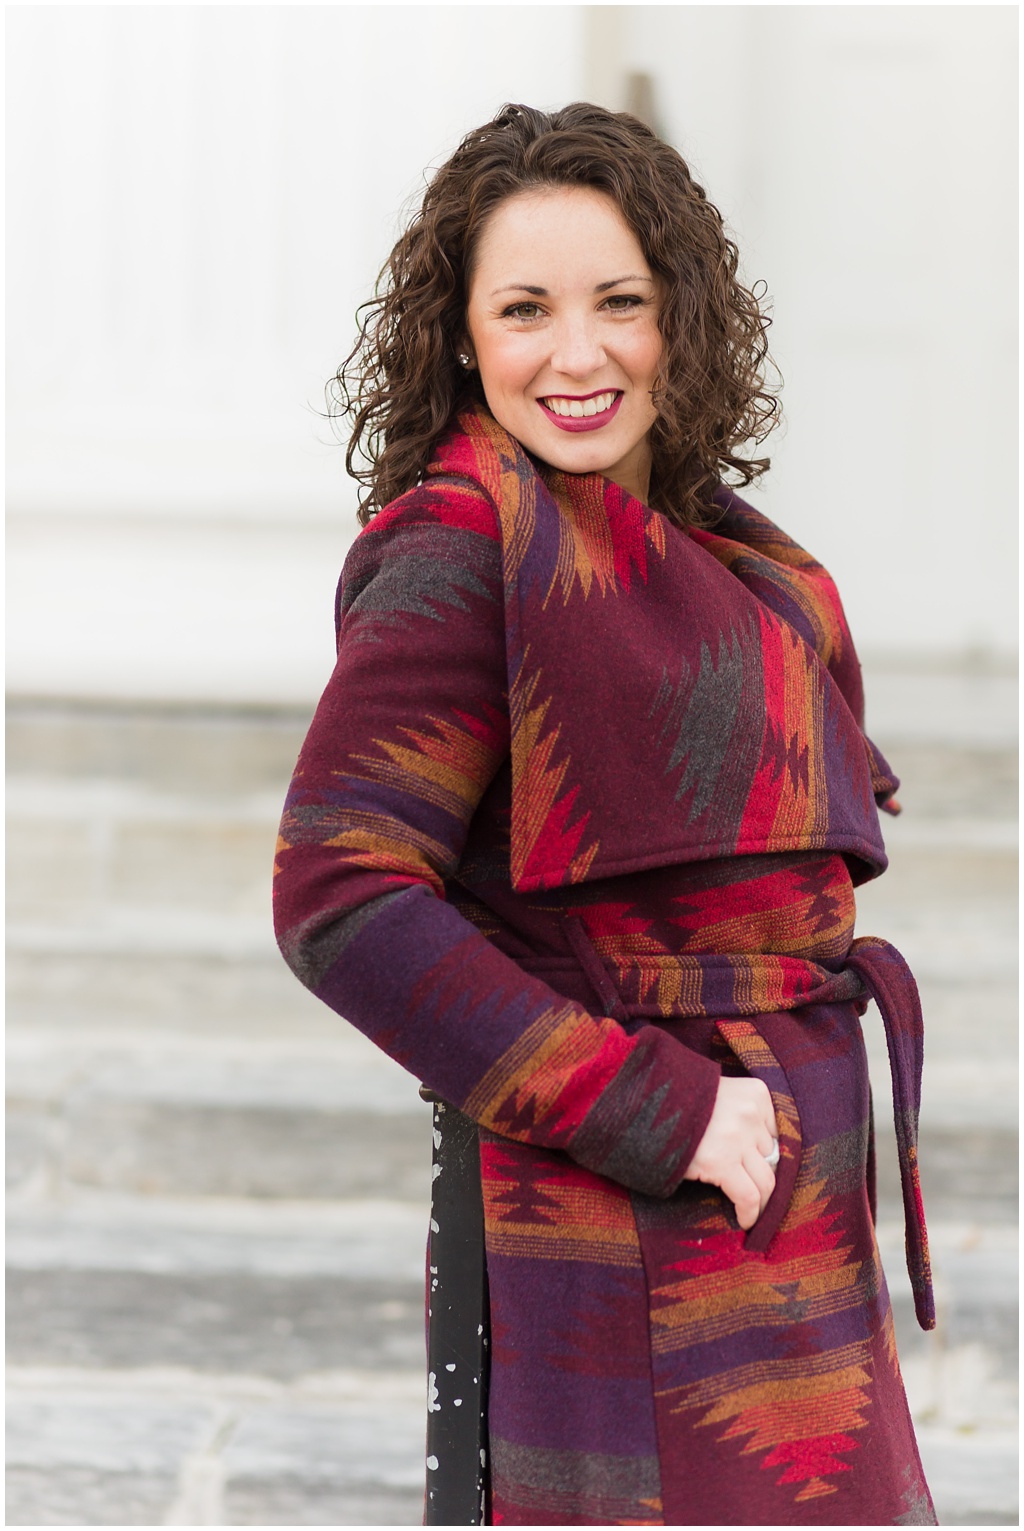
These last set of shots, we incorporated her beautiful jacket that she got as a recent gift for her birthday. Again, I knew that jacket against that clean background would just POP. 

I got a full body, mid length and closer shot again of her in her jacket for additional variety. 

Same location, three looks | Wide, Medium and Tight | Cinnamon Wolfe Photography | NJ Wedding Photographer

There were many more photos as well from this set of images, but I just wanted to highlight how easy it can be to get tons of choices and lots of variety without moving locations or drastically changing the pose. Simply moving your feet (if you use primes) or zooming in or out can create very different looks all from one simple pose! 

I hope you found this helpful and that if you are struggling with creating variety during your client sessions, you can use this technique to get different looks without changing things up and moving locations! 

Any questions? Let me know in the comments! I love hearing from you. ;-) 

Easy Peasy OCF for beginners : Part 1

I am so excited for today's post! I feel like OCF (off camera flash) is a subject that seems SO intimidating especially for newer photographers and I am really hoping that I can break this down to help this make sense to someone who is interested in learning OCF but isn't finding a ton of helpful resources online. 

I would like to also preface this post by saying that I am in no way any sort of expert in flash photography. I do prefer working mostly with natural light, but I also feel there are a TON of benefits to using artificial lighting in photographs. Having the knowledge of how to use a speedlight and WHEN to use it just gives you that much more control of the look you are trying to achieve. 

This will be a two part series. Easy Peasy. Today we are talking terminology and then the next post in the series will have some step by step examples. My goal is that by the end of these two posts you will go from knowing almost nothing about OCF to having a relatively good understanding of how to at least use ONE speedlight (flash) to enhance your options when photographing or if you are a wedding photographer, the goal is for you to be able to use an on camera and off camera flash together to totally rock out reception photos! 

Ready to get started? Let's do it! 

OCF for Beginners | Cinnamon Wolfe Photography | NJ Wedding Photography

When I first started doing research on OCF, one of my biggest hurdles was even understanding what I was reading. It felt like so many tutorials were written by photographers who mainly worked with artificial light, so their knowledge on the subject was just so deep that they couldn't bring themselves back to that place where someone who knew nothing of the subject could make heads or tails of what they were talking about. They threw around words and terms in their explanations that I had never heard before and therefore I couldn't really even comprehend what they were trying to teach. 

So let's start with some basic terminology and then go from there, shall we? 

Terms associated with flash photography

Speedlite

Also referred to as a flash or flash gun. Small, lightweight, portable, run on batteries, relatively inexpensive. Attach to hotshoe of a camera or fired wirelessly on a coldshoe. Don't usually have as much power as a strobe and may have longer recycle times. 

Strobe

Also referred to as a studio strobe. Not as portable as they need to be plugged into a power source or a larger battery pack. They produce more flash power and recycle times are much shorter. Generally more expensive that speedlites. 

Hotshoe and coldshoe

Hot shoe is the mounting point on top of your camera to attach a flash. Cold shoe is on a light stand or other equipment not attached to a camera. 

Triggers

Also referred to as wireless triggers or pocket wizards (which is a brand). These are the small units that let your camera "trigger" the flash unit to go off (produce a burst of light). In dealing with OCF there needs to be a way for the camera and the flash unit to "talk" to each other, triggers are that mechanism. 

Modifiers

Anything you might put in front of your flash unit to diffuse (spread out) the light. Umbrellas or soft boxes are common. 

Bounce

When you point your flash unit some other direction instead of directly at the subject and "bounce " the light. Typically you would do this against a white wall in order to avoid color casts. When you point your flash directly at your subject the light is extremely harsh, when you point the flash at a white surface and bounce the light into the room, the light hits the subject in a more "natural" way and does not appear as harsh. 

Ambient Light

The light available in the scene without using any artificial light. When you take a photo using a DSLR in manual mode, you use the exposure triangle (aperture, ISO and shutter speed) to find "correct" exposure of ambient light or available light in your scene. 

Sync Speed

Unless you are using a speedlight with High Speed Sync (HSS) the sync speed is the shutter speed at which you need to stay UNDER in order to use the speedlite without seeing a black line on your final image. Typical sync speeds range from 1/160 to 1/200. If your shutter is opening and closing too fast (for example 1/500) the shutter is not open long enough to capture the light that is popping out of the flash and on to the subject and the result is usually an image where the top is lit and the bottom is black or dark. 

Power Setting

This is the flash output level. 1/1 would be the highest (brightest) power setting.  1/128 is the lowest output on most speedlite. 

Manual

This is when you manually tell the speedlight how much power to use. All speedlites should have a manual mode where you control the output levels. 

TTL or ETTL

TTL means "through the lens". This is a speedlite that essentially uses the in-camera meter to determine how much power to output. It is an automatically controlled burst of light based on what the camera "sees" and determines the amount of light is needed for the scene. 

The Basic of all Basics

Ok so now that we know the terminology, let's just get into the bare bones of understanding how to work with OCF. 

First, why do we talk about the flash being OFF the camera and not on?

The short answer is: options.

When your speedlite is ON your camera you only have a few options of where to point it and you are limited to the distance between you and the subject. You can point the flash at the subject (which is usually the least flattering) or you can point it up and bounce off a ceiling or you can point it at an angle or behind to bounce the light off of a wall. You don't have the ability to move the light closer or further away from the subject, you are limited to it being the same distance as you are from the subject. 

When you take the light and take it off the camera and put it somewhere else you have so many more options. You can use a larger modifier to put in front of the light, you can create dimension by angling the light in relation to your subject, you can even put it BEHIND your subject to create dimension behind the subject or create a back or rim light. 

Second, how in the world do I know how to dial or choose my settings? I feel like I just mastered the exposure triangle and now I'm adding in another variable. Does everything I already learned just fly out the window? 

The short answer is: NO! 

When you introduce any sort of artificial light, everything you know about finding your exposure for ambient light stays the same, you just might have to think about it a little differently because you will also have an additional exposure for the flash working WITH the ambient light in the scene. 

Basically you have two exposures you are finding instead of one: Flash and ambient.

In MOST situations for portrait or wedding photographers the ambient exposure will be for the background and the flash exposure will be for the subject. (Please note, this is not true in ALL situations, this is just an example for the absolute basics...save the angry emails for some other topic, pretty please?) 

Ambient exposure: Background (choose aperture, ISO and shutter speed for desired exposure on background)
Flash exposure: Subject (choose your flash power to light your subject) 

For mostly natural light photographers, this concept can be challenging because we are normally always exposing for the subject and not super concerned with what happens in the background. So adding in that step to consciously think about what you WANT the background to look like can be a different way of thinking for some. But once this concept "clicks" the technicals of incorporating a flash seems much less daunting. 

To close out this post, I think it's important to mention that I personally only use my flashes on manual. I do not have a TTL flash, nor do I think it is necessary for what I am normally trying to achieve when using artificial light. I prefer to have the control over my flash power setting because I think it helps me understand exactly what is happening with the light instead of letting the camera/flash choose for me. 

Stay tuned for the next post in this series and we will go over flash power settings and how to choose them and some basics on how to set things up when working with artificial light! 

Part 2 <---Click here  

BONUS Part 3! <---- Click here

Was this helpful? Have you used OCF before?