An easy, 3 step process to consistent Black and White images {video}
/
When I first started out in photography, I was so green that I totally didn't realize that black and white conversions happened in post processing...I always thought the photographer switched something on their camera and BOOM, the photo was taken in black and white! Granted, most point and shoot cameras have a B&W setting, so I was assuming it worked the same for the pros.
I soon realized that B&W conversions take place after the fact, but they aren't always super easy. Well, actually, I lie. They CAN be easy to do (one click in Lightroom) but that one click doesn't always end up looking that great.
Playing around with different settings and sliders in LR you can come up with lots of ways to achieve a nice looking black and white photograph. I was finding that I was playing around with it too much though and all of my B&W photographs were looking different from each other and thus not creating a consistent "look" for my clients.
After lots of trial and error, I have finally figured out a formula that I use for every photograph I end up changing to black and white and it is literally a three step process! Sometimes its easy to fall into the trap of thinking that if something is simple, its not "good", but in this case I have fought the urge to feel that way and I am very happy with my resulting B&W photographs.
If you prefer video and watching instead of reading, by all means skip down to the bottom and view my video on going through this exact process!
Before converting
Not every photo needs to be in B&W. I am a firm believer that a black and white finish can dramatically improve a photo, but it doesn't work with ALL photos. I do know some photographers who provide color AND black and white versions of all the images in their final gallery and honestly, I just don't understand it, but for them it seems to work.
I tend to look for photos that have especially strong emotion in them as I feel like when you strip away the color, the emotion shines even brighter.
***TIP: When providing images to a client, if you end up converting the image to B&W, always provide a color version as well. This will save you from having to go back in and include a color version when the client asks for it. And trust me, they will ask!
3 step process
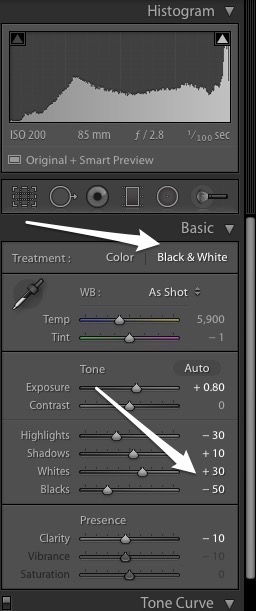
Step one: Create a virtual copy of the photo in LR and convert that photo to Black and White in Develop Module

Step two: increase the whites to +30
Step three: decrease blacks to -50
Results
Here is our original photo

After the one click B&W conversion, here is the result
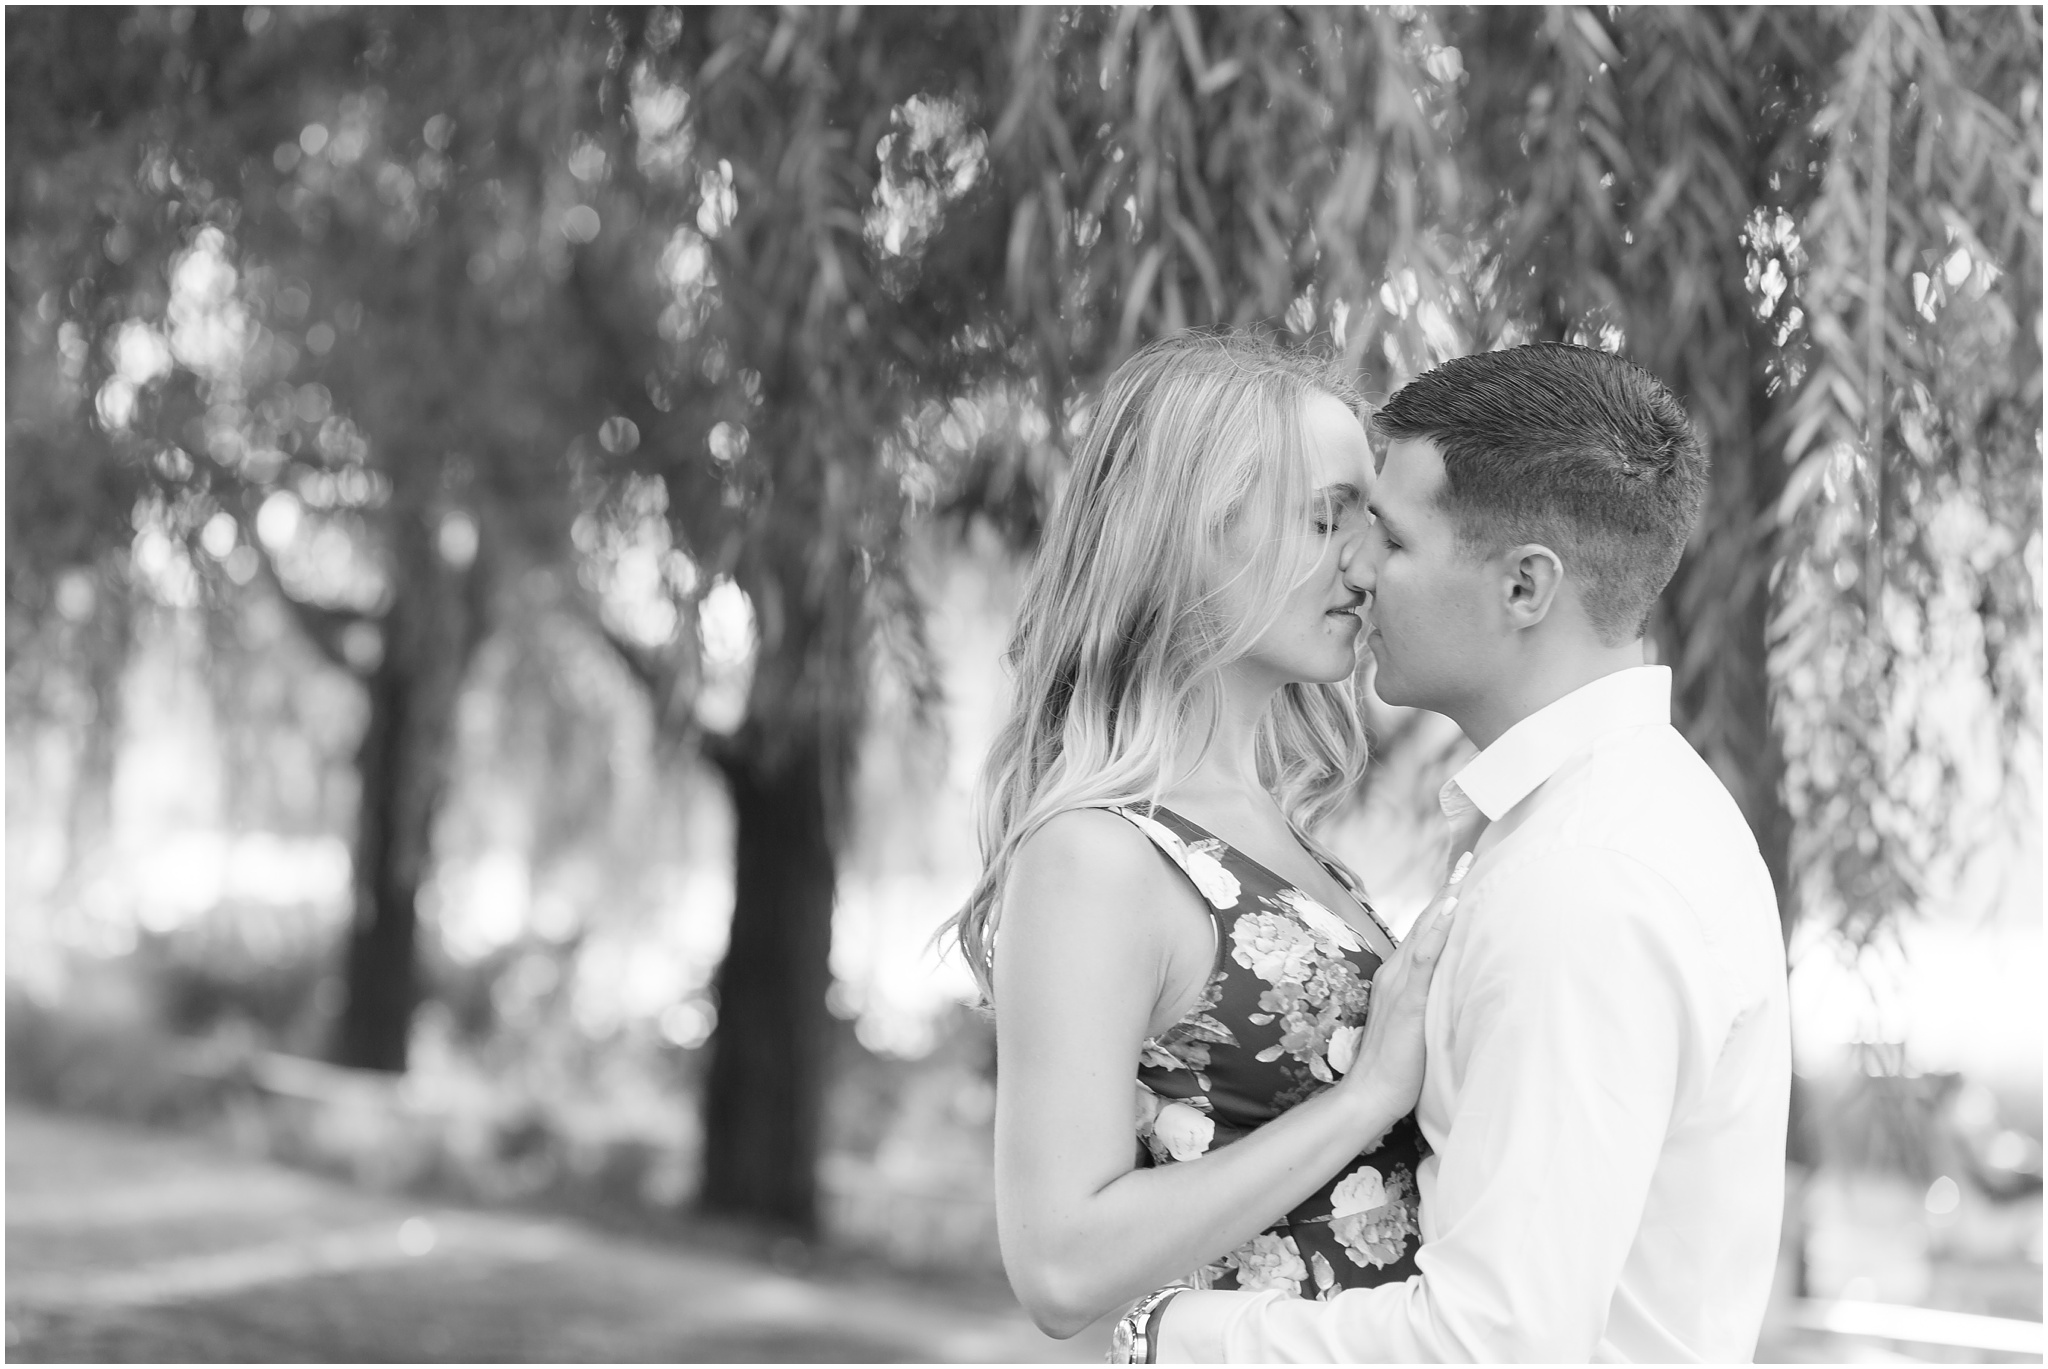
And then after the tweaks to the whites and blacks (and a little help from a gradient) here is our final photo!

The reasoning behind adjusting the whites and the blacks is hopefully obvious from this example. When clicking the black and white conversion, everything in the photo ends up looking more grey than true black and white. By brightening the whites and darkening the blacks, you end up with more actual black and white color in your photo, thus creating more contrast, which in my opinion is the whole point of a black and white photo!
I do tend to use gradients on quite a few of my photos as well, and black and whites are no exception. I love using the gradient as a way to direct the eye to exactly where I want it to go. More info on that in the video!
Do you have any fun tricks for converting into black and white? Let me know in the comments!