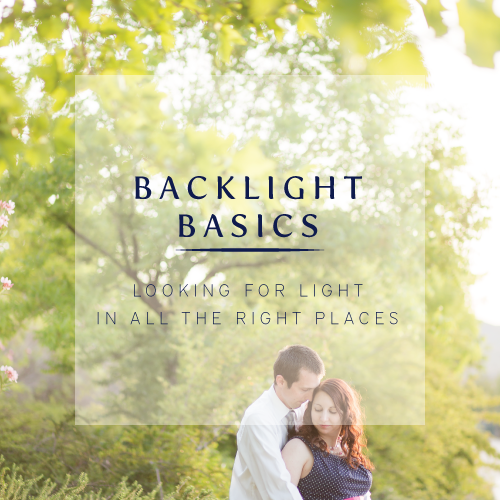
Backlight Basics : Looking for light in all the right places
/As a photographer, its important to learn about all different types of light. Everything in photography revolves around light. What kind of light do you have available? How will the camera read and record the light in the scene? Where are the highlights and where are the shadows? Do you need to add or subtract light?
Essentially everything starts with light and goes from there. In continuation of my "Looking for light in all the right places" series, today we are talking about backlight.
- What makes it so dreamy?
- How to achieve the "glow"
- Important considerations when attempting to shoot into the backlight
- Pitfalls to avoid

WHAT IS BACKLIGHT?
The technical definition of backlight is:
verb (used with object), backlighted or backlit, backlighting
2. to illuminate (something from behind.)
Pretty self explanatory right? The LIGHT is in the BACK (or behind) your subject.
A common misconception from many people who don't understand the technicality of photography or lighting (as was mine when I first started) is that the more light the better. In reality, the direction of the light is much more important than the amount of light you have available. Shooting into the backlight often results in photographs that tend to be warm and "glowy" because the light is literally wrapping itself around the subject.
HOW TO SHOOT INTO THE BACKLIGHT
Shooting into the backlight or shooting in backlight situations can tend to get a little tricky. Although it does take quite a bit of practice, once you figure out a rhythm of how to set up your shot, how to expose correctly and what situations to look for, you will be shooting successfully backlit photographs consistently. Shooting backlit scenes quickly became one of my favorite things to do and I find myself constantly looking for areas and locations that would work well for backlit shots.
Some things you need to take into consideration when attempting to shoot backlit photos:
Time of Day
The time of day is essential for backlit photos. In order for the light to be coming from behind the subject, the sun has to be lower in the sky. When the sun is high in the sky, its almost impossible to put the sun behind your subject because...well, no one is that tall! Shooting in the early morning or in the few hours before sun sets is the absolute best time to achieve backlit photos.
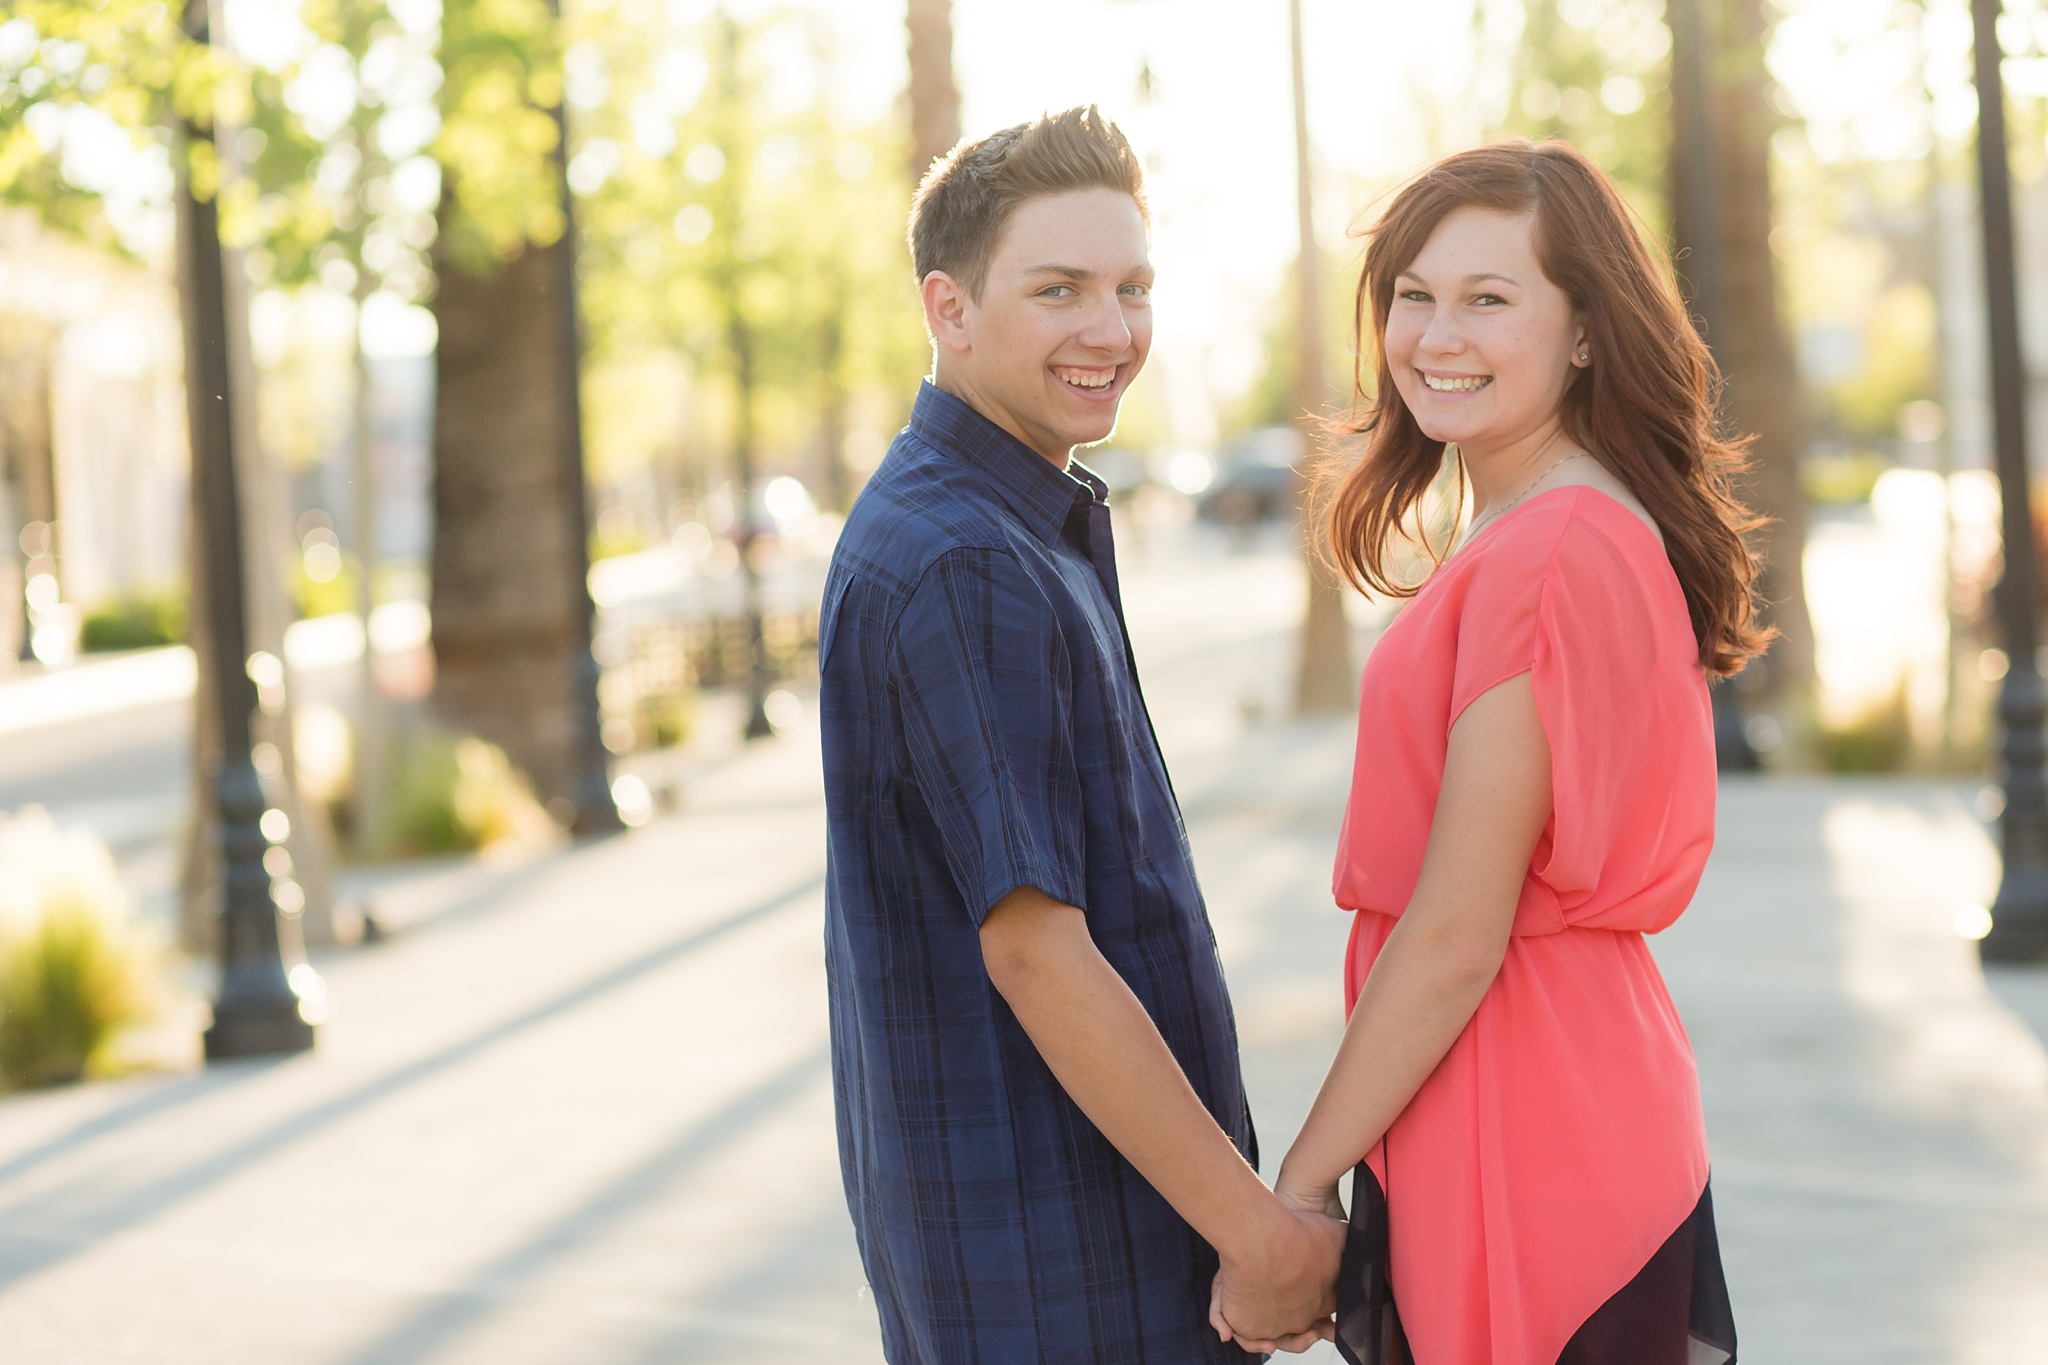
You can see in this photo below of my stepson and his girlfriend that the sun is lower in the sky although its not completely at the horizon. The sun is behind and to the right of them (you can tell from the direction of the shadows on the ground.)
Diffusion
One of the things that making shooting into backlight tricky is that when you put the sun behind your subjects, you are then directly facing the sun. Anyone who has pointed a camera in the direction of the sun knows that sun flares and haze are often the immediate result. However, if you have the ability to diffuse the light by using objects in the environment, you can get the shot without a distracting flare or haziness on the images. Trees work really well for diffusion as well as taller buildings or other natural elements. A scrim or reflector can also work to diffuse light if you are positioned in a way where the sun is hitting your lens directly.
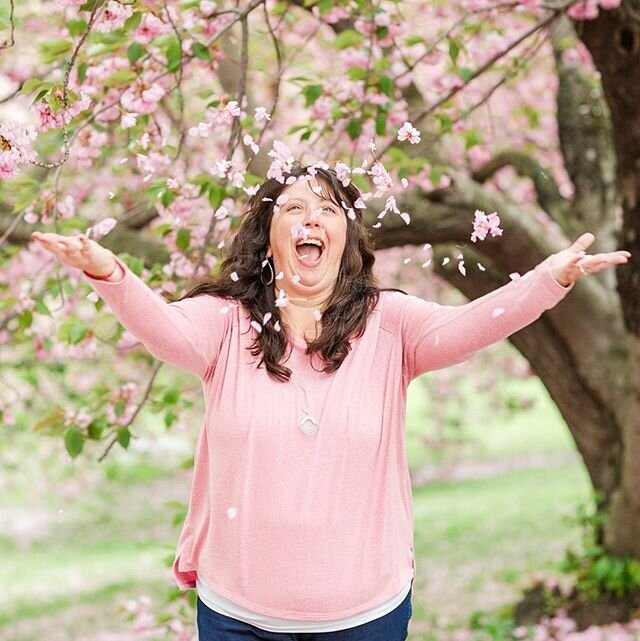
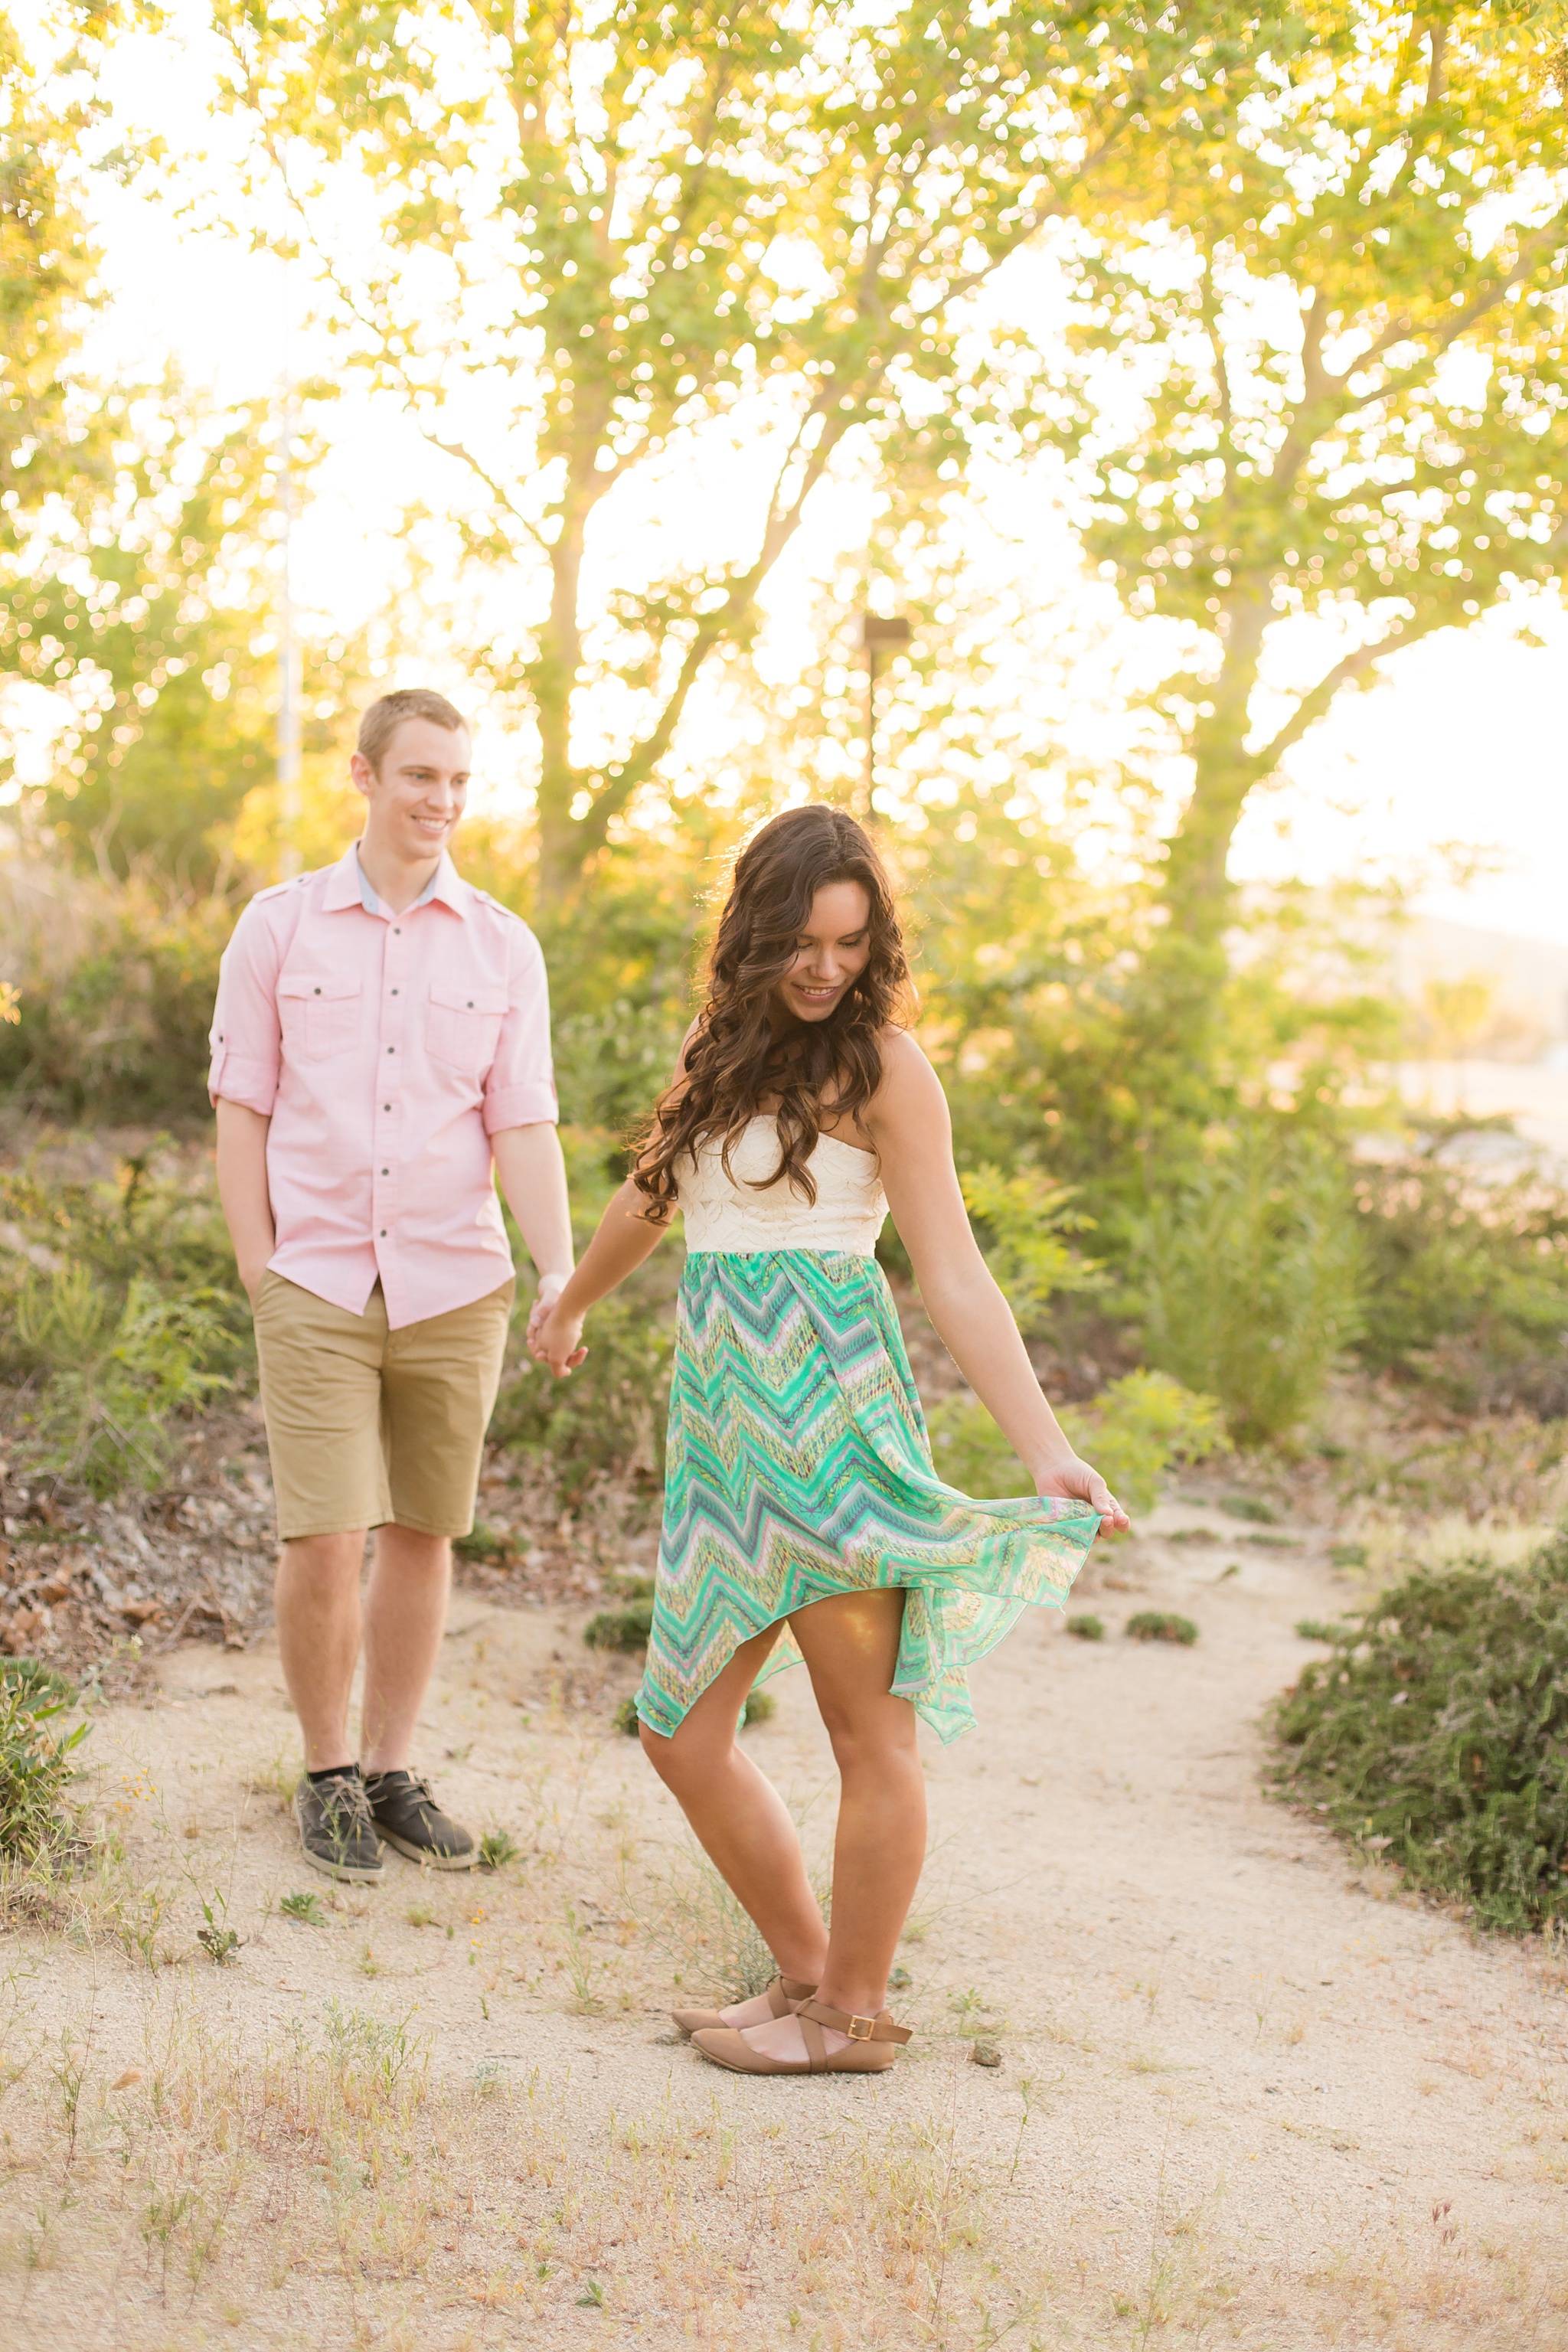
Sometimes flares end up in photos anyway and often times they can add a really beautiful element to a photo! Other times they can look out of place or distracting. In the photo below I caught a slight flare that ended up right on Mary's leg. Its not horribly distracting in this image, but sometimes lens flares look incredibly out of place and awkward. While the sun was lower in the sky I placed Trevor and Mary here for a couple of reasons. I wanted the sun to filter through those trees because I knew it would give me some beautiful bokeh. I also knew I could position myself in a way where the sun would be directly behind one of the tree trunks so as to cut down on any potential flare. The neutral colored sand also added a great natural reflector.
Natural Reflectors
Speaking of natural reflectors...when shooting into the backlight, they are imperative. The a very bright light sources is coming from behind your subject, depending on how you expose the photo, your subject can end up looking really flat, under exposed and muddy. If you don't have light bouncing back up on to them, your dynamic range will be too great and you will have difficulty achieving a well exposed and pleasant looking photograph.
Its for this reason that I attempt to find lots of natural reflectors when shooting outside and especially in the backlight. For the below photo, the sun was low in the sky and to the right creating some beautiful filtered light behind them. The concrete path bounced light back up on to their bodies and faces thus creating a beautifully lit photo of both the subjects and the background.

Background
Despite the fact that light always trumps background, taking the background into consideration for your backlit photos is never a bad idea. When scoping out your session location, look for dense areas of foliage or leaves next to more sparse areas. Pay attention to how the light falls across whatever elements you are considering for your background.
Isn't Mary just stunning? This photo works so well, not only because Mary is beautiful and radiant, but the glow and warmth of of everything surrounding her just lends itself to the expression on her face. The bokeh mixed with the neutral green and gold tones along with the way the light is filtering through her hair ads complexity, depth and texture. She was standing on a concrete pavement so there is nice light bouncing back on to her face and she has a gorgeous little catchlight in her eye. The exposure on her face is not competing with the exposure on the background.

Camera Placement/Lens Flare
Although I mentioned this briefly above, when shooting into the backlight you have to pay special attention to exactly how you place yourself in relation to your subject. In the below photo of Ashley, I distinctly remember struggling to avoid flare. I ended up placing myself right on the edge of the shadow that the building was casting in order to get her right in between the sun and my lens. I did not use a reflector to bounce light up into her face in this photo and she was standing on some grass, so the difference in exposure between her face and the highlight on her hair is on the verge of being to far apart. If I would have brightened her up some, I would loose detail in her hair (much of which is already lost). I still love this photo because I love her expression and the happiness and warmth, its just an example of how not having even a little bit of light bouncing on to your subject can affect the overall end result of the photograph.
And a few things to keep in mind when attempting to shoot into the backlight....
- Try to avoid pointing your camera directly at the sun. This may seem like common sense, but when you are positioning your subject with the sun behind them and then pointing your camera at them, it happens more than you know. I don't think small amounts of time pointing at the sun will completely damage your lens, but better to be safe than sorry.
- Make sure you have something available to bounce light on to your subject. If a natural reflector is not available, use a regular reflector to bounce some light back on to your subjects face. This is the one I use and it works great! It can be difficult if you are shooting alone but you'd be surprised how often you can get others to help you. And kids LOVE the reflector, they think its just the coolest thing ever. Sometimes I break it out and have one of the older kids just hold it even though we might never end up using it at the shoot.
I hope these tips and tricks encourage you to go out and practice shooting into the backlight. It is honestly one of my favorite types of shots to capture and I can't wait to see what you come up with!