Backlight Basics : Looking for light in all the right places

As a photographer, its important to learn about all different types of light. Everything in photography revolves around light. What kind of light do you have available? How will the camera read and record the light in the scene? Where are the highlights and where are the shadows? Do you need to add or subtract light? 

Essentially everything starts with light and goes from there. In continuation of my "Looking for light in all the right places" series, today we are talking about backlight.

  • What makes it so dreamy?
  • How to achieve the "glow"
  • Important considerations when attempting to shoot into the backlight
  • Pitfalls to avoid
How to shoot a backlit photo

WHAT IS BACKLIGHT?

The technical definition of backlight is:

verb (used with object), backlighted or backlit, backlighting
2. to illuminate (something from behind.)

Pretty self explanatory right? The LIGHT is in the BACK (or behind) your subject. 

A common misconception from many people who don't understand the technicality of photography or lighting (as was mine when I first started) is that the more light the better. In reality, the direction of the light is much more important than the amount of light you have available. Shooting into the backlight often results in photographs that tend to be warm and "glowy" because the light is literally wrapping itself around the subject. 

HOW TO SHOOT INTO THE BACKLIGHT

Shooting into the backlight or shooting in backlight situations can tend to get a little tricky. Although it does take quite a bit of practice, once you figure out a rhythm of how to set up your shot, how to expose correctly and what situations to look for, you will be shooting successfully backlit photographs consistently. Shooting backlit scenes quickly became one of my favorite things to do and I find myself constantly looking for areas and locations that would work well for backlit shots. 

Some things you need to take into consideration when attempting to shoot backlit photos:

Time of Day

The time of day is essential for backlit photos. In order for the light to be coming from behind the subject, the sun has to be lower in the sky. When the sun is high in the sky, its almost impossible to put the sun behind your subject because...well, no one is that tall! Shooting in the early morning or in the few hours before sun sets is the absolute best time to achieve backlit photos. 

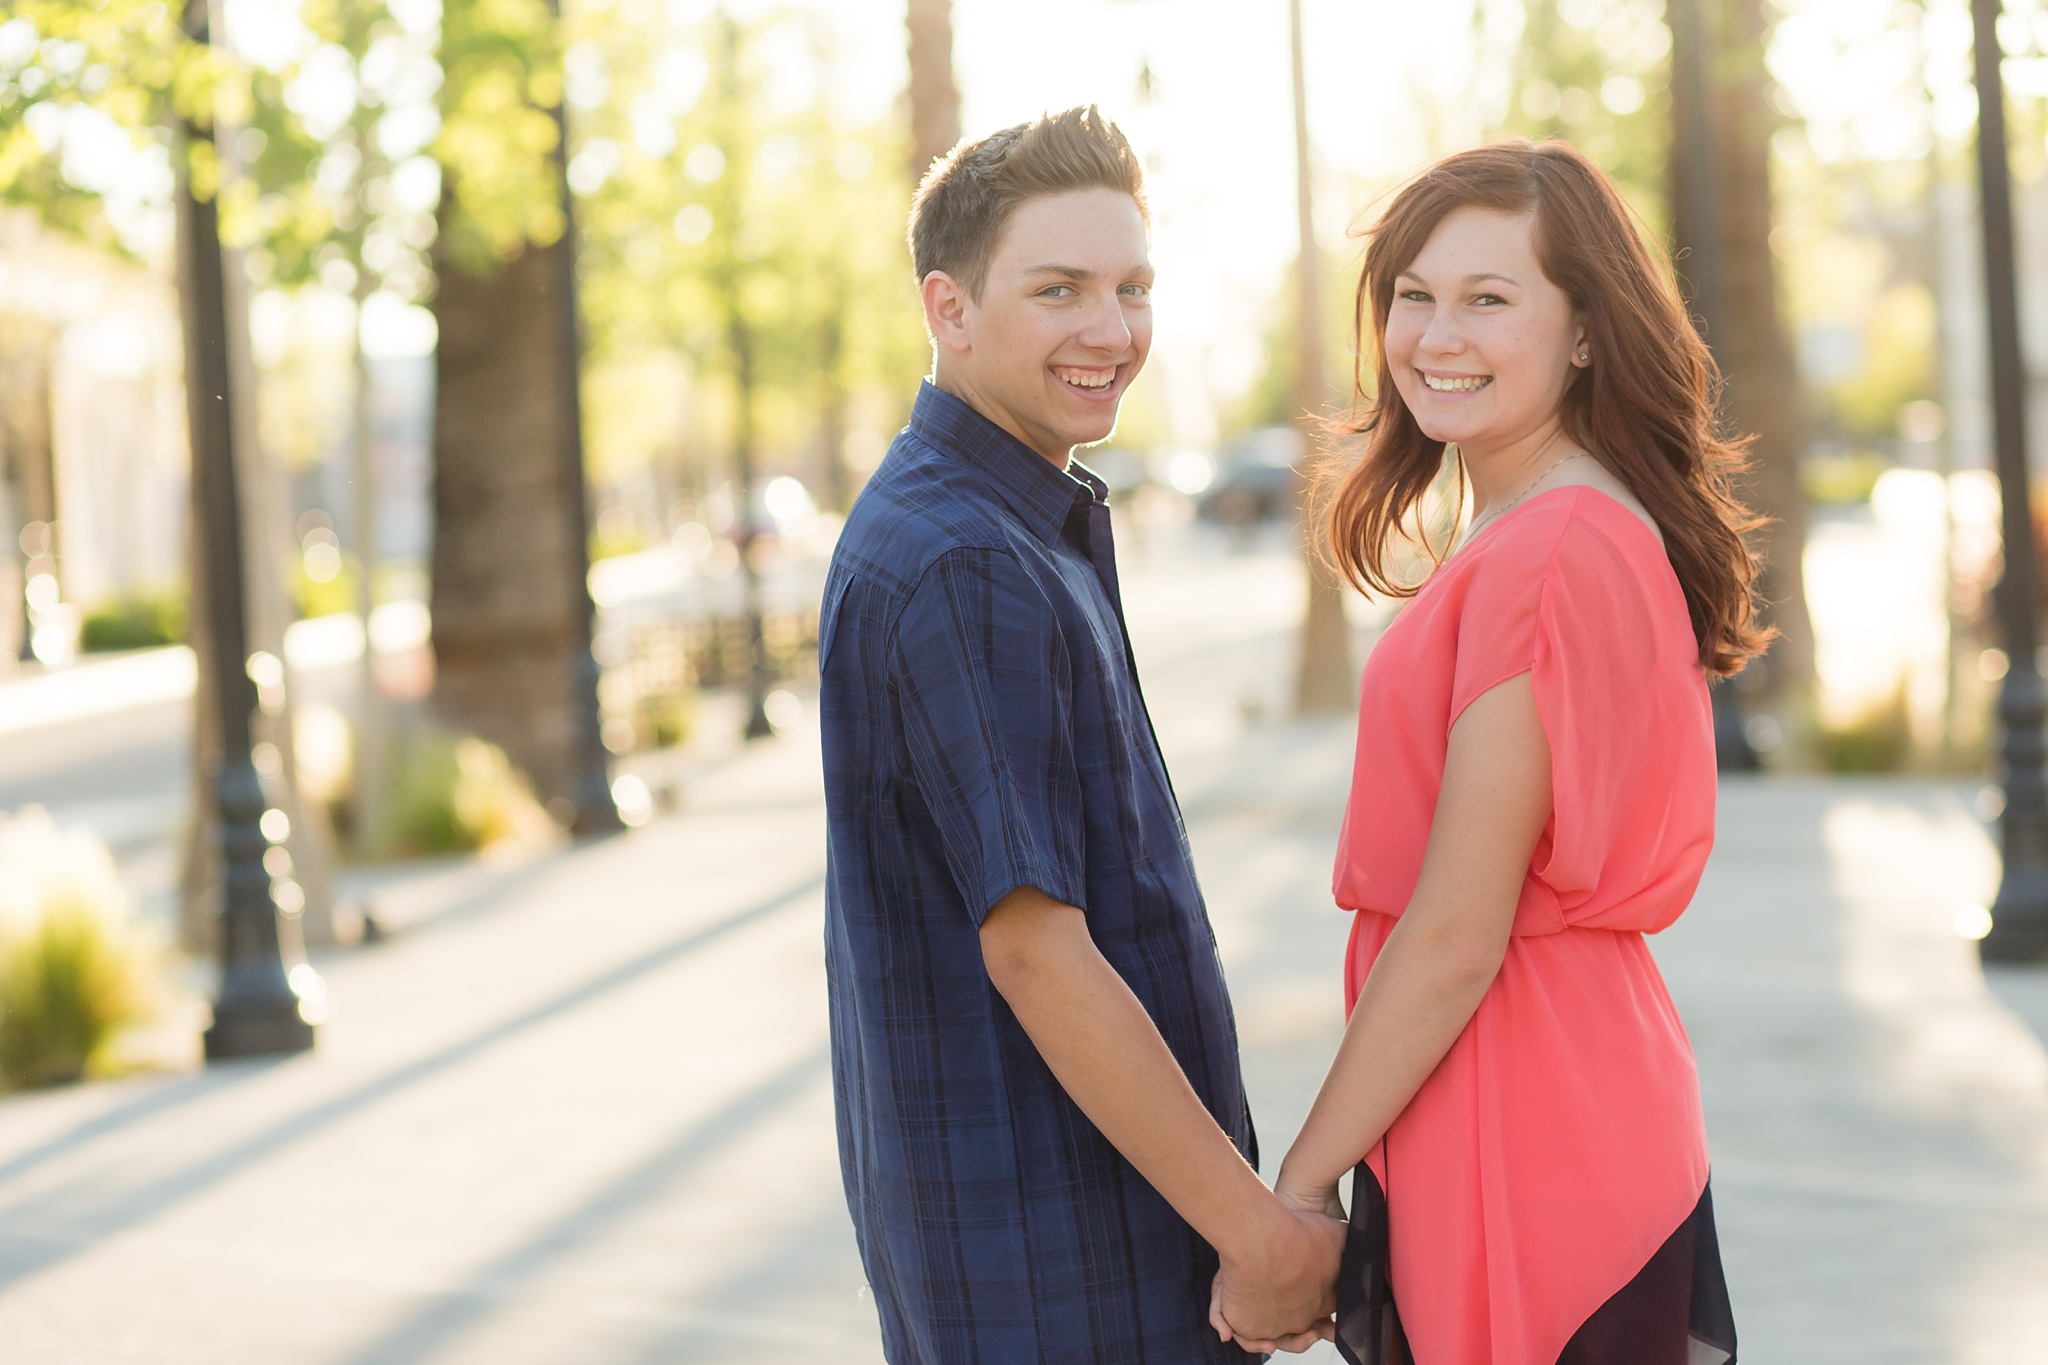
You can see in this photo below of my stepson and his girlfriend that the sun is lower in the sky although its not completely at the horizon. The sun is behind and to the right of them (you can tell from the direction of the shadows on the ground.) 

How to shoot a backlit photo

Diffusion

One of the things that making shooting into backlight tricky is that when you put the sun behind your subjects, you are then directly facing the sun. Anyone who has pointed a camera in the direction of the sun knows that sun flares and haze are often the immediate result. However, if you have the ability to diffuse the light by using objects in the environment, you can get the shot without a distracting flare or haziness on the images. Trees work really well for diffusion as well as taller buildings or other natural elements. A scrim or reflector can also work to diffuse light if you are positioned in a way where the sun is hitting your lens directly. 

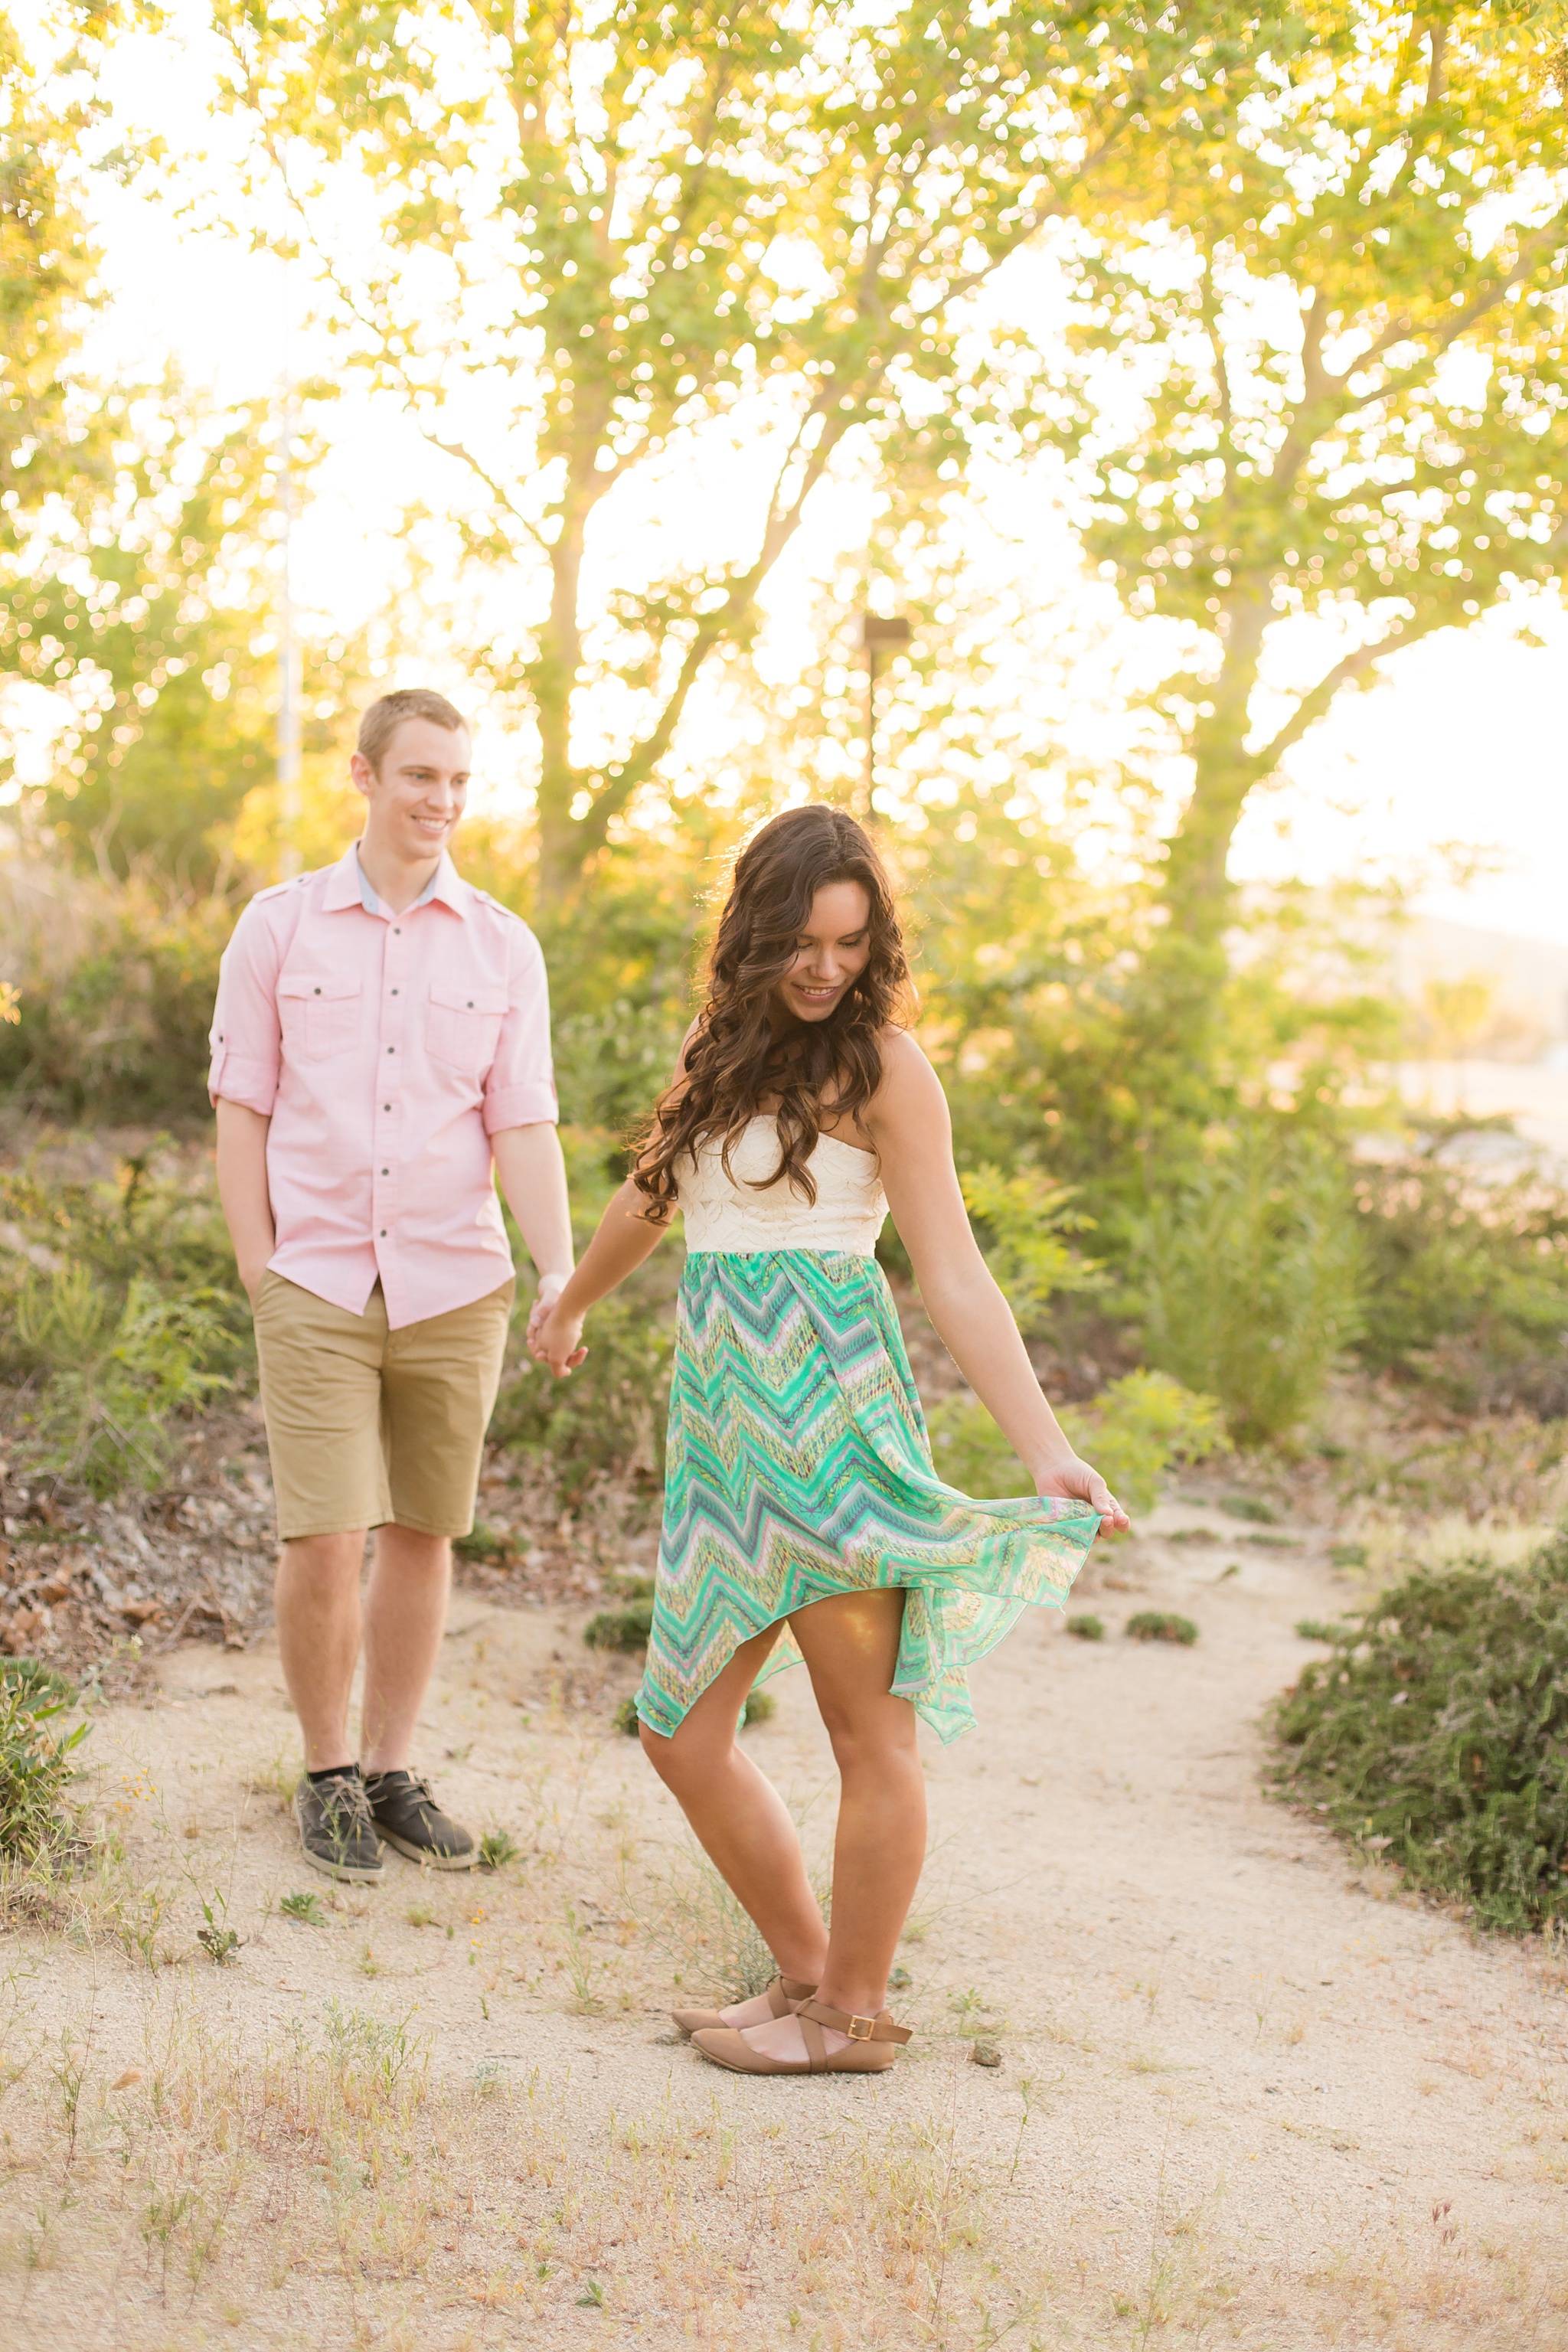
Sometimes flares end up in photos anyway and often times they can add a really beautiful element to a photo! Other times they can look out of place or distracting. In the photo below I caught a slight flare that ended up right on Mary's leg. Its not horribly distracting in this image, but sometimes lens flares look incredibly out of place and awkward. While the sun was lower in the sky I placed Trevor and Mary here for a couple of reasons. I wanted the sun to filter through those trees because I knew it would give me some beautiful bokeh. I also knew I could position myself in a way where the sun would be directly behind one of the tree trunks so as to cut down on any potential flare. The neutral colored sand also added a great natural reflector. 

How to shoot a backlit photo

Natural Reflectors

Speaking of natural reflectors...when shooting into the backlight, they are imperative. The a very bright light sources is coming from behind your subject, depending on how you expose the photo, your subject can end up looking really flat, under exposed and muddy. If you don't have light bouncing back up on to them, your dynamic range will be too great and you will have difficulty achieving a well exposed and pleasant looking photograph. 

Its for this reason that I attempt to find lots of natural reflectors when shooting outside and especially in the backlight. For the below photo, the sun was low in the sky and to the right creating some beautiful filtered light behind them. The concrete path bounced light back up on to their bodies and faces thus creating a beautifully lit photo of both the subjects and the background. 

How to shoot a backlit photo

Background

Despite the fact that light always trumps background, taking the background into consideration for your backlit photos is never a bad idea. When scoping out your session location, look for dense areas of foliage or leaves next to more sparse areas. Pay attention to how the light falls across whatever elements you are considering for your background. 

Isn't Mary just stunning? This photo works so well, not only because Mary is beautiful and radiant, but the glow and warmth of of everything surrounding her just lends itself to the expression on her face. The bokeh mixed with the neutral green and gold tones along with the way the light is filtering through her hair ads complexity, depth and texture. She was standing on a concrete pavement so there is nice light bouncing back on to her face and she has a gorgeous little catchlight in her eye. The exposure on her face is not competing with the exposure on the background. 

How to shoot a backlit photo

Camera Placement/Lens Flare 

Although I mentioned this briefly above, when shooting into the backlight you have to pay special attention to exactly how you place yourself in relation to your subject. In the below photo of Ashley, I distinctly remember struggling to avoid flare. I ended up placing myself right on the edge of the shadow that the building was casting in order to get her right in between the sun and my lens. I did not use a reflector to bounce light up into her face in this photo and she was standing on some grass, so the difference in exposure between her face and the highlight on her hair is on the verge of being to far apart. If I would have brightened her up some, I would loose detail in her hair (much of which is already lost). I still love this photo because I love her expression and the happiness and warmth, its just an example of how not having even a little bit of light bouncing on to your subject can affect the overall end result of the photograph. 

How to shoot a backlit photo

And a few things to keep in mind when attempting to shoot into the backlight....

  • Try to avoid pointing your camera directly at the sun. This may seem like common sense, but when you are positioning your subject with the sun behind them and then pointing your camera at them, it happens more than you know. I don't think small amounts of time pointing at the sun will completely damage your lens, but better to be safe than sorry. 
  • Make sure you have something available to bounce light on to your subject. If a natural reflector is not available, use a regular reflector to bounce some light back on to your subjects face. This is the one I use and it works great! It can be difficult if you are shooting alone but you'd be surprised how often you can get others to help you. And kids LOVE the reflector, they think its just the coolest thing ever. Sometimes I break it out and have one of the older kids just hold it even though we might never end up using it at the shoot. 

I hope these tips and tricks encourage you to go out and practice shooting into the backlight. It is honestly one of my favorite types of shots to capture and I can't wait to see what you come up with! 

The Expo Disc

The Expo Disc | Looking for Light in all the right places | Cinnamon Wolfe Photography | NJ & NYC

The Expo Disc may seem like an odd topic when talking about "looking for light in all the right places", but once you have a solid understanding of what this little gem does for you, I am hopeful that it will make more sense. 

I purchased an Expo Disc early on in my photography career, when I was in the "sucker for facebook ads trying to sell me every nifty gadget possible stage." We all remember that stage right? Or are possibly still right in the middle of it? Don't worry I have another post regarding presets and actions coming in the future...everyone who has spent too much money on presets/actions, raise their hand!!

Ok put your hand down now and get back to learning about this tool that I honestly believe makes your life as a photographer easier. I know very successful photographers who swear by expo discs, I know very successful photographers who roll their eyes when they hear of them mentioned, but either way, this tool does DO something!! Let's take a look at what it does and then we can all go on to make our own informed choices about how we want to run our business. No judgement, pinky swear! 

The Expo Disc | Looking for light in all the right places | Cinnamon Wolfe Photography | NJ & NYC

All about that white balance

If you are pretty versed in all things white balance you can probably skip this next section. If the term "white balance" is relatively new to you or you just enjoy my writing SO MUCH that you couldn't possibly imagine skipping over some sentences...then by all means...let's discuss some white balance, shall we? 

Light in general ranges in temperature and tint (blue to orange, green and pink) Our eyes are really good at reading light and making adjustments to the color of the light to render (to us) a true white under most circumstances. Cameras are obviously not as skilled as our naked eye, so when a digital photo is snapped, crazy light colors may remain and true white is no where to be found. 

Have you ever seen someone post a photo online that looks remarkably blue or orange? Or sometimes even a little green-ish or pink-ish? (I won't make you raise your hand again...but we ALL have, right?) 

This is a white balance problem and it can oftentimes the bane of a photographers existence. Everything we do deals with light...we ain't go not time for crazy colors up in our photos ruining everything!

There are MANY ways to deal with white balance issues in digital photography. Your camera has numerous settings that you can mess around with to see visually what ends up looking the best. You can change your white balance in post processing, especially if you are shooting RAW, its a relatively easy thing to adjust once you are at the editing stage. You can use a grey card when shooting or you can manually adjust Kelvin temps right in your camera to assist nailing that perfect white balance in camera. I could talk forever and forever (snoooozefest!) about all of those methods, but TODAY we are talking about my preferred method...the Expo Disc. 

ENTER THE EXPO DISC 

The general purpose of the expo disc is to measure the light falling ON your subject. It also compensates for ALL angles as opposed to light coming from one direction. In addition to assisting your camera determine proper white balance for the light you are in, it also works similarly to a incident meter, which basically helps you determine "proper exposure". {I often put proper exposure in quotes because what is "proper" when it comes to exposure is so incredibly subjective that I just can't for the life of me say it without the quotes, however, if you know how to dial to 0 for exposure on your DSLR...you know what I mean. }

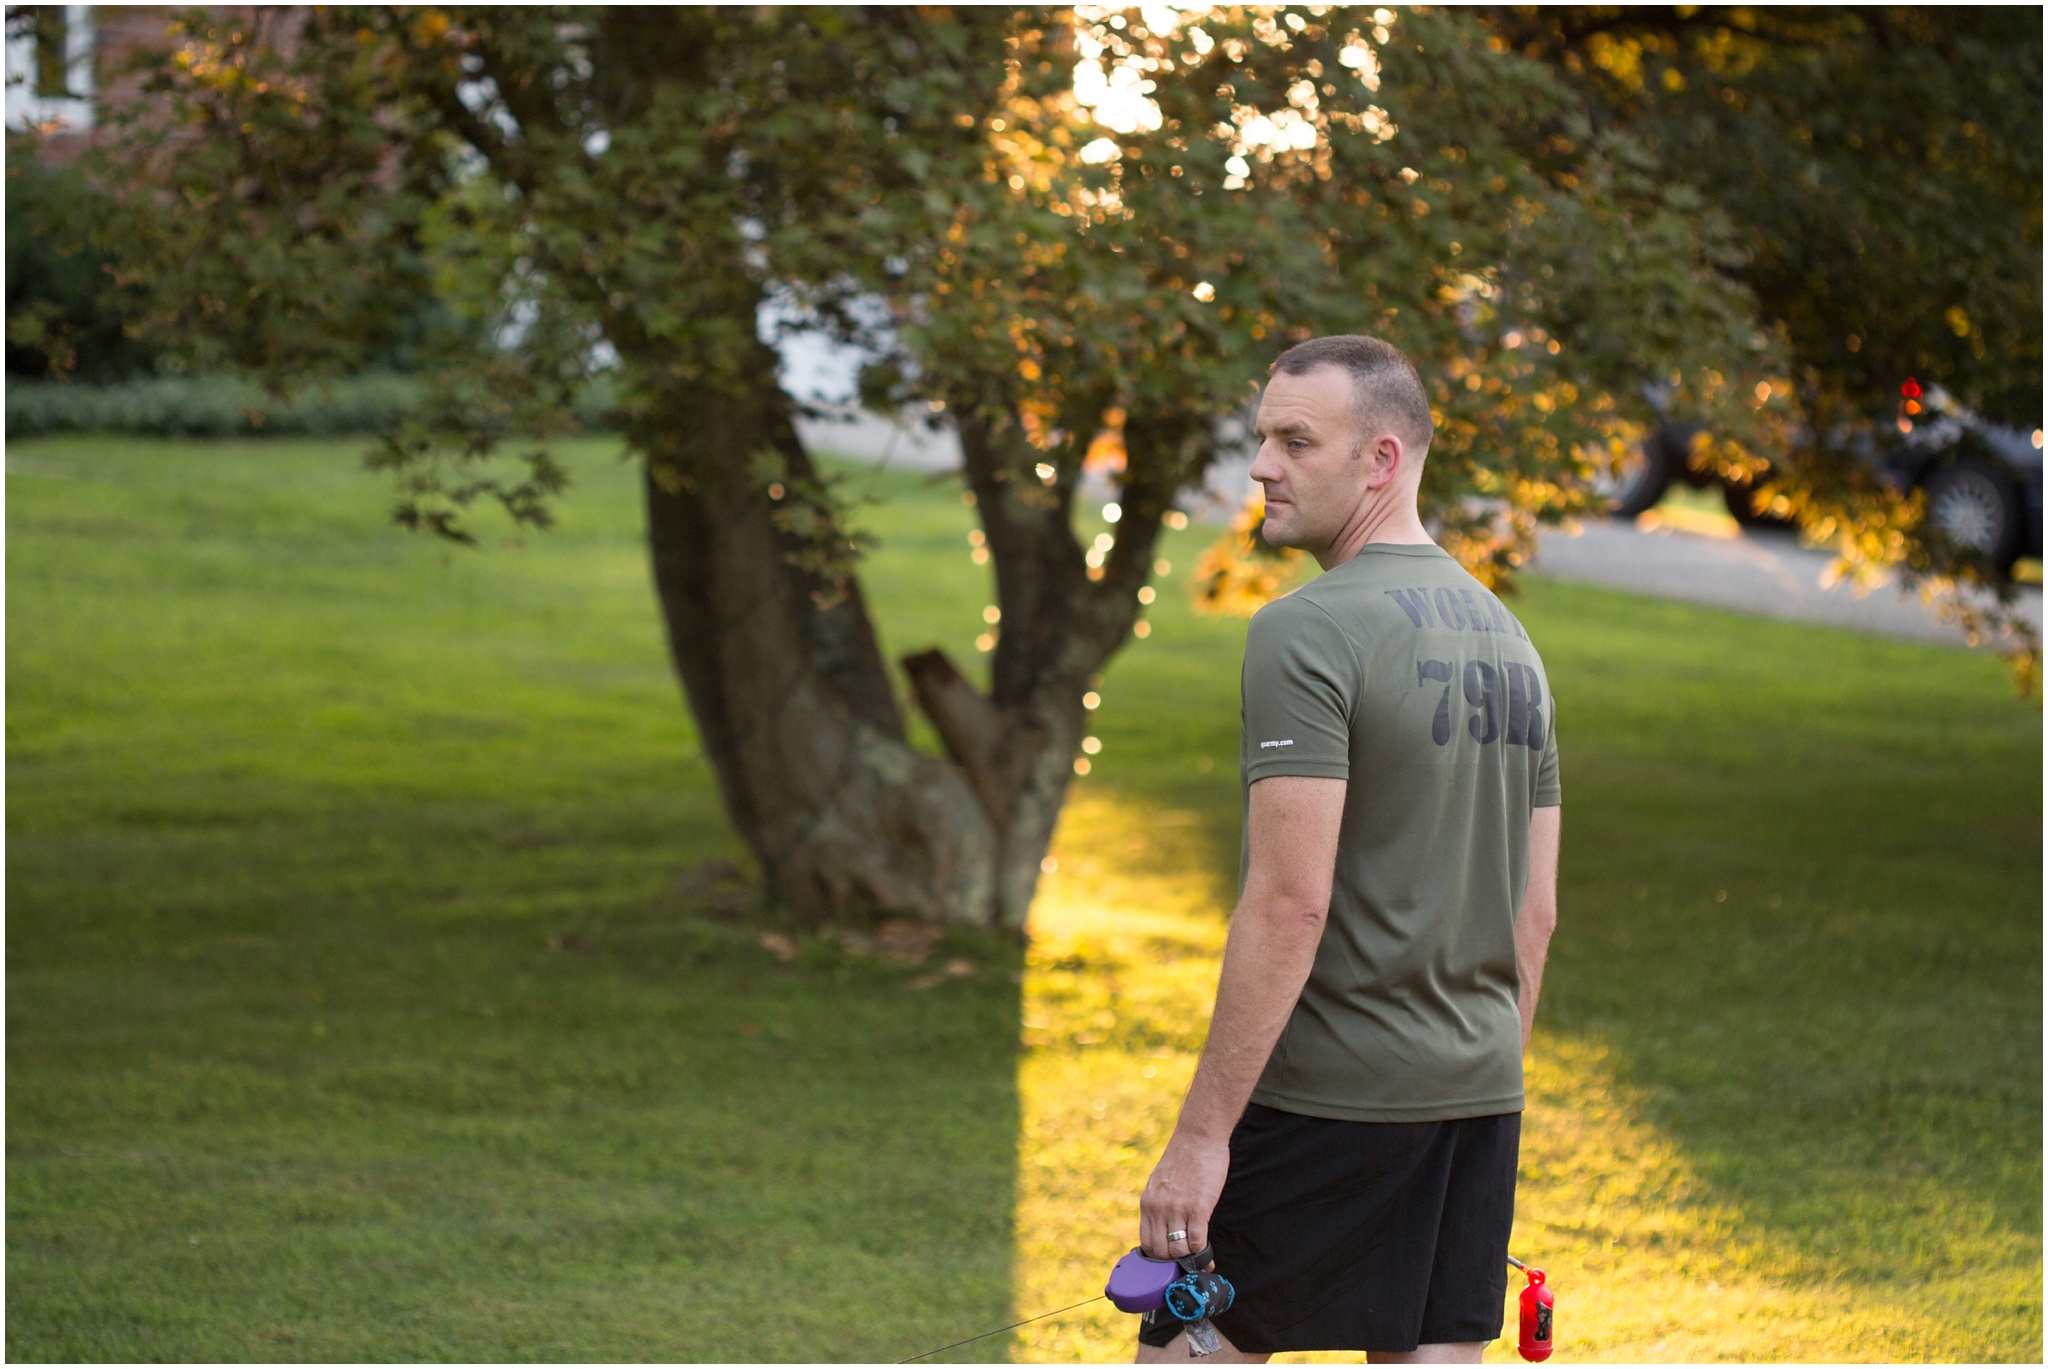
Before I continue, let's look at an image taken in the same light, same settings. The first image was taken with the cameras Auto White Balance setting and the second was taken after using the Expo Disc (which I will explain how to do further in this post.) 

I just got a 100mm macro lens (WOO HOO let's party!!) {more on that later btw}...and Paul and I were out walking the pups in our new neighborhood, so I thought I would be the weird-neighbor-who-shoots-photos-of-her-husband-while-they-are-walking and take some example photos for this post. Hey, a blogger gotta do, what a blogger gotta do right? 

The settings for the below photos are: 100mm, ISO 200, f/2.8, 1/160. 

The only difference between the two? The use of an expo disc to set white balance. 

The Expo Disc | Looking for light in all the right places | Cinnamon Wolfe Photography | NJ & NYC

The top photo doesn't look "horrible" right? Please say right. There IS a lot of green going on in the background and his shirt but if you never saw the 2nd image...the 1st image would probably be "acceptable right? 

But when you see that 2nd image and can see the difference in his skin, it changes everything. It looks much more natural and normal and doesn't have a slightly green-ish, drab looking appearance like it does in the first photo. 

I don't know about you, but I would much rather have my images coming straight out of camera looking like the 2nd image rather than the first. So much less post processing to deal with and I can be certain that the colors represented in my photos are accurate and natural. 

SO, HOW THE HECK DO I USE THIS THING?

I'm gonna be straight up honest with you. Remember how I said I got the Expo Disc early on in my photography journey? Well, I did, but I didn't really start using it until recently....and on sessions with toddlers, I still hardly use it. Even though it REALLY doesn't take a lot of time or energy, when chasing toddlers and young ones it is an extra step that makes the process more frustrating for my client, so I don't bother.

I throw my camera in AWB and hate my life during post processing. Just kidding, its never THAT dramatic. ;-) 

The reason I didn't start to use it right away is because I just didn't understand how it worked. I was still busy trying to understand the exposure triangle, business taxes, how to set up my website and how to direct my clients. I just didn't have the energy to spend trying to figure out one more thing. But about eight months ago, I picked it back up after Amy & Jordan's workshop (thank God for those two!) and pretty much use it every time I shoot now. Once you get the logistics of how it works, it just flows. And its also a great conversation starter with clients too! They are always curious with a process they haven't seen before and usually ask about it so I stole A&J's line and tell them its my "magic disk that makes them look even more amazing in their photos".

People love looking amazing. Don't you?

The Expo Disc | Looking for light in all the right places | Cinnamon Wolfe Photography | NJ & NYC

Another before & after of Paul using the expo disc on our walk. ***Note...expo discs can tend to shoot a little on the warm side, so depending on your taste and style you might have to bump your temp down slightly in post process. But from experience, you probably already know its way easier to cool off a photo than it is to warm it up! No idea why, it just is so deal with it OK? 

THE NITTY GRITTY

Step by step instructions for use of the expo disc...which includes one instruction** that I had never read or heard before learning it at A&J's workshop and it CHANGED EVERYTHING about how I use the expo disc. Of course after I learned it, it seemed intuitive, but yeah, no...didn't catch on originally. 

In your camera:

  • Set your white balance to CUSTOM
  • **Set your metering to evaluative (Canon) matrix (Nikon) (<----) this is it!!! So important!!! 

To set up your shot:

  • Set up your scene of what you are going to shoot. Have a good understanding of exactly where you will be standing when you take the shot. Choose your aperture and ISO. 
  • Take your Expo Disc and hold it over your lens (the textured side facing outward)

Important note...expo discs come in a variety of sizes, but I recommend the 77mm because it will fit over ALL your lenses. You don't want to get one that is smaller and then it doesn't cover one of your wider lenses

  • Walk over to where your subject is and point the camera back to where you will be standing when you take the shot. (<-----IMPORTANT)
  • Look through the viewfinder (you will see a solid grey-ish image), and set your exposure to 0 on the dial you see in the viewfinder. 
  • Take the shot. 
  • Walk back to where you want to stand in order to capture your image.
  • Navigate to Custom White Balance in your camera nav menu (I highly recommend putting it into your shortcuts of favorites on your camera), hit SET
  • It should pull up that last image (solid, grey) that you took, click SET
  • Go through the remaining prompts to set the white balance with that image. 
  • Compose your image and take your shot! 

A couple of things to keep in mind when using this bad boy....

  • If you are constantly moving around in and out of different lighting, this may not be the best solution for you. 
  • If you are taking a photo of something on the ground, you don't necessarily have to get down on the ground and point the camera up, but you can point the camera in the general direction of the light source hitting your subject to attempt to get proper white balance and exposure.
  • It may SEEM like a complicated process, but I promise, once you get it down, it just becomes 2nd nature. 
  • I shoot on a Canon 6d and I typically have to overexpose by about one stop after I get the reading from the expo disc. I'm not exactly sure why and I know part of it is the fact that I like to shoot "lighter" but play around with it and see what works best for you and your specific camera. 

OK! I hope that was helpful and that you have a little more information now about what an Expo Disc is and what it can do for you. You can purchase one HERE and as always let me know if you have ANY questions at all! I'm happy to answer! 

Other posts in the Looking for Light in all the Right Places series:

***post does NOT contain affiliate links and I was not compensated by ExpoImaging in anyway. All opinions are my own!